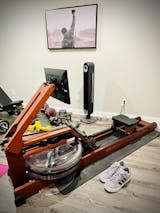
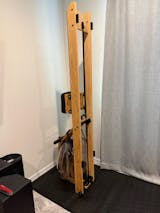
Having solid rowing form is the bedrock to your experience on the Ergatta rower; this ensures you get the most out of every workout, engaging each muscle group without risking injury.
In this video we demonstrate the four phases of rowing technique so you can keep fine-tuning your form. Use this article to solidify what you’ve learned, and keep on hand when you need a refresher.
THE PHASES OF ROWING
Rowing consists of four phases performed in a coordinated sequence: The Catch, the Drive, the Release, and the Recovery.

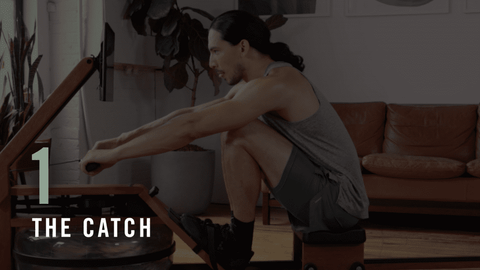
The Catch is the most important phase of the row. This is where you are loading up potential energy like a coiled spring.
-
Your legs are compressed and your shins are vertical.
-
With a long spine, fold forward from the hips so your body leans to 11 o’clock.
-
With your shoulder blades tucked, reach your arms as far forward as possible. Pull yourself into the Catch to load the spring, and brace your midsection to maintain a rigid body.

The Drive is the only phase of the row where you are generating power. Therefore, you’ll want to get the most power out of each stroke to be efficient. In other words, power is how much force you’re applying to each stroke. Especially when you’re starting out, it might be tempting to apply a low force and compensate by taking a greater number of strokes per minute (SPM). (We cover SPM here.) However, reducing the number of strokes you take and instead adding more force will be more sustainable for longer workouts.
-
Drive the feet into the footplate while keeping your core firm to maintain a long, neutral spine with your body leaning forward to 11 o’clock.
-
Once the legs straighten, pivot from the hips to swing your body angle from 11 o’clock to 1 o’clock. Your shoulders should be behind the hips with the arms fully extended.
-
Draw the handle toward your chest with elbows driving away from the body, finishing at the chest.

The Release is how you finish the Drive by quickly extending the arms forwards.

The Recovery is the rest phase of the row when your body slides back forward toward the tablet. Staying relaxed during the Recovery phase will pay dividends in your workouts, especially in longer rowing sessions, by giving you back a little rest each stroke to recharge for the next.
-
When you’re getting started, your ratio of pulling:returning forward will be about 1:2 seconds. With practice, you’ll likely be closer to a 1:1 ratio.
-
In other words, you’ll initially be in a relaxed, or recovery, state for twice as long as you’ll spend applying effort.
PUTTING IT ALL TOGETHER
Each phase should be complete before initiating the next. You’ll move from Catch → Drive → Release → Recovery → back to Catch, continuing the pattern.
As you drive, lead with your legs followed by your body; your arms pull to your chest last. The power in your Drive should be coming from 60% legs, 30% body, and 10% arms. The legs are where your power comes from.
When you release, you’ll do the reverse — leading with your arms, followed by your body, and ending with your legs bending into Catch position. For a one second drive, it should take two seconds to release during the recovery.
Take some time to practice on your own to get a feel for the stroke. For additional rowing form instruction, you can navigate to the “Help Videos” section of the app on the Ergatta rower.


